 Have you ever planned to turn on your harbor breeze ceiling fan with remote control without reaching the switch on the wall? Yes, now you can do it! Everything will be in the palm of your hands now!
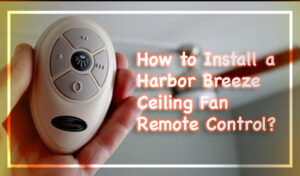
Here, we will take you on a step-by-step tour of how to install a harbor breeze ceiling fan remote control in six easy steps! Even if you are a newbie, you can do it!
Try it on and be a professional in your house
Step by Step Guide for Installing Harbor Breeze Ceiling Fan Remote Control
Nowadays, you can easily get a ceiling fan with light and a remote. And when it comes to your comfort zone, you will surely want it! Let us know how you can install it!
Step 1: Check the Motor
First thing first, check the motor of the fan. As you are dealing with a ceiling fan, there will surely be a motor. The spinning motor coils are usually added to the ceiling fans these days. The capacitor of the fan helps in running the energy. As a result, there will be torque. And this built torque will aid the fan blades in spinning.
For learning more, you have to go through the fan canopy and open it up. There will be three basic wires. These wires are the connector between the lighting and the motor of the fan. There is a black fan wire. This wire is designed for powering the motor of the ceiling fan. On the other hand, there is also a blue wire. It helps in working with the light fixture and lighting it up.
And lastly, the white wire starts working. The job of the white wire is to be neutral once among the other wires. This is designed for both the light and the motor! All these black, white and blue wires will be connected to the new remote control receiver that you have!
Step 2: Protect Yourself
Before you are ready with the ceiling fan remote control kit, you must go through the protective gears! Yes, this is the first thing you have to do when it comes to working with electrical stuff. Along with this, testing new wires is necessary.
All you have to do is test it with a non-contact voltage tester. Do not start working without proper testing because you might end up damaging the property. Besides, there can be severe accidents if you are not careful enough. Go through the hardware stores or the home improvement stores. There, you will easily get the non-contact voltage testers.
When you start working, check the power of the fan and switch it off. You have to shut down the power at the breaker. Now, get your hands on the remote receiver and take off all the packaging. Get the required tools prepared so that you don’t need to run to the market in between the job.
Step 3: Deal with the Wires
Four screws hold the fan canopy in the right place and keep it safe from instability. In this step, you have to go through those four different screws that are holding it so that you can get access to it. For this job, you better get your hands on a stepladder so that the work is done properly. Remove the screws one by one. After removing, securing them is vital because you won’t be able to add the fan canopy again if you lose the screws.
Once you have secured them carefully, you have to go through the canopy of the fan motor and drop open it. After opening it, you will see that there are several ceiling fan wirings inside. Along with this, there will be an attached hanging bracket. It is usually added to the ceiling fan electrical box. Check if everything is placed as mentioned or not.
Step 4: Identify the Wires
As you have already got all the wires, to learn how to install a harbor breeze ceiling fan remote control, it is time to identify the wires so that you can start the installation process. If you are new to the electric world, you should get it done by professionals. But if you are still interested, you have to be very careful.
You will see that the wire connectors twist together and this is where you have to locate the wires. First of all, you have to search for the white wires. This is directly connected to the ceiling fan’s electrical box. There will be two white wires. All you need to do here is pull the white plugs apart. Now that you are done with the white wires, you have to make sure that you have run your hands on the black wires. Untwist the black wires first from the black electrical box. Lastly, you have to check the blue wires and untwist them so that you can pull them apart.
In this situation, you will also see the green wires connected there. Don’t touch it. You do not need to disconnect the green wires. The remote receiver that you have got includes the white, black and blue wires just like this one. There is a ceiling fan side of your receiver. Check that part and you will see that there are labels that note all the motor wires.
There are notes on the neutral wire along with the light wire. After you have checked these wires, you have to move to the other side of your receiver. There, you will be able to see one white wire with one black wire. These will be connected to the corresponding colors on the electric box!
Step 5: Connect the Wires
Check the electrical box wire now. The receiver wires must be added to the electrical box wire. For this, you have to match the colors of the wires. After finding their match, you must twist wire connectors and add them there. For each pair, you will need one wire connector.
Go through the black electrical box wire and ensure that it is added with match marked AC/IN on the receiver. After this, check the white and black wires that are on the receiver. Connect them carefully to their matching wires on the electrical box. When you are ready with the wires connected, you have to check the hanging fan bracket and insert your receiver behind it!
Step 6: Add the Canopy
Yes, you are almost done! Take the canopy and get your hands on the screws. All you need to do is screw the canopy in its right place. Switch the power breaker on and then test the fan. Check the remote and try it! It will surely work!
Wrap Up
You can easily install a harbor breeze ceiling fan remote control without any professional help now! All you have to do is go through the step-by-step method and ensure that you have worked properly with the wires! Also, take the safety precautions beforehand!
Check out our site for more information on electrical devices and their installations! There is nothing we can’t help you install!
I’m James. The author of Electricalaffairs.com. It’s been my passion to deal with power tools and gears. This website is mainly to talk about electrical wirings, lighting, various power source tools and accessories. I want to explore tackles and help people to grow their basic knowledge about electrical things. I would also like to help people to pick the right power tool for their daily needs.