Installing a self grounding outlet is an important part of any home improvement project. It is a simple process, but one that requires care and attention to detail. Having a properly grounded outlet is essential for the safety of you and your family.
In this blog post, we will outline the steps necessary to install a self grounding outlet in your home.
Tools and Materials Needed
Before you begin the installation process, it is important to make sure you have all of the tools and materials necessary to complete the job. You will need:-
- Self-grounding outlet
- Screwdriver
- Needle-nose pliers
- Wire strippers
- Electrical tape
- And a voltage tester
Removing the Old Outlet
The first step in the installation process is to remove the old outlet. To do this, turn off the power to the circuit at the circuit breaker. Once the power is off, use a screwdriver to remove the screws holding the outlet in place. Carefully pull the outlet away from the outlet box, being careful not to damage the wires.
Wiring the New Outlet
Now that the old outlet has been removed, it’s time to wire the new self grounding outlet. Begin by removing the cover plate and then use a voltage tester to make sure that the power is still off. Next, use the wire strippers to remove about an inch of insulation from the ends of the wires.
Connect the black wire to the brass terminal, the white wire to the silver terminal, and the green/ground wire (if have one) to the green terminal. Finally, wrap all of the connections in electrical tape for added protection.
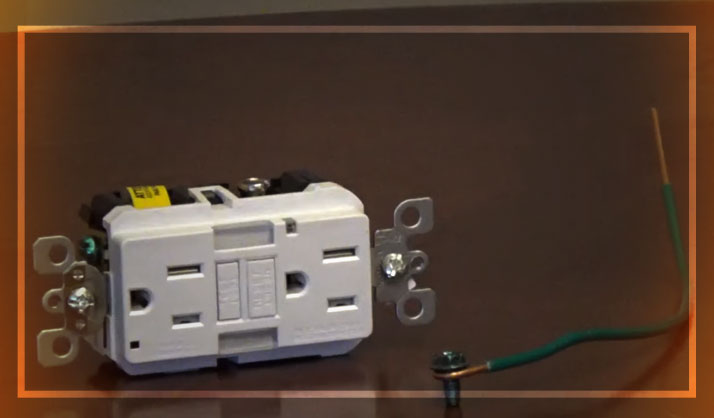
Placing the Outlet to the Metal Box
The final step in the installation process is to securely attach the outlet to the outlet box. First, Remove the paper washer from under the assembly plate where the gold-colored grounding clip is located. It is needed to create direct metal-to-metal contact between the outlet yoke to metal box. This can also be done via a grounding pigtail, screwing from the green terminal to the metal outlet box.
Then, Place the outlet on metal outlet box. Use the mounting screws included with the outlet to secure it to the box. Make sure to tighten down the assembly plates as well as self grounding clip, so that the yoke contacts the metal box very well. This will ground the outlet automatically to the metal box. Finally, replace the cover of the outlet.
Testing the Outlet
Once all the installation process is done, it is time to test the outlet. To do this, turn the power back on and use a voltage tester to make sure that the outlet is receiving power. If the voltage tester reads 120 volts, then the outlet is properly wired and ready to use.
Conclusion
Installing a self grounding outlet is a relatively straightforward process, but it is important to take the time to do it correctly.
Following the steps outlined in this blog post will ensure that the outlet is properly wired and safely installed. Once the installation is complete, you can rest assured that your home is protected from electrical hazards.
I’m James. The author of Electricalaffairs.com. It’s been my passion to deal with power tools and gears. This website is mainly to talk about electrical wirings, lighting, various power source tools and accessories. I want to explore tackles and help people to grow their basic knowledge about electrical things. I would also like to help people to pick the right power tool for their daily needs.