 New fluorescent lights are not only beautiful but also energy efficient! You might be planning to replace the old one and add a new light fixture there! In this case, we must remind you that you can add a fluorescent bulb there. Along with that, you can also add a pendant fixture or a regular light there too!
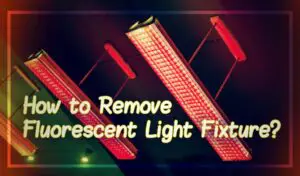
But whatever you add there, your first job is to remove the previous fluorescent light. And for this, you must know how to remove fluorescent light fixtures at home without any expert.
Here is an easy method of the fluorescent light fixture that will help you install a new one without any complication! Go for it and be your electrician!
Step by Step Guide for Removing Fluorescent Light Fixture
Replacement in the ceiling lights can change the aura of your room. If you want to change the light fixture, we have an easy step-by-step procedure for that! Take a look and follow it!
Step 1: Disconnecting the Power
Your first work is to disconnect the electricity. No matter what electric work you are doing, it is necessary to turn off the power so that there are no chances of any unwanted accidents. Turn off the power to the light that you are going to deal with.
Go through the circuit breaker box of your house and make sure that it is properly disconnected. Also, in some cases, people install smart plug with the light fixtures so that they can control the light remotely. You have to disconnect the smart plug before you start working with the removal method.
Step 2: Dealing with the Screws
As you have already planned for removing the old fluorescent light fixture, what are you planned to add in its place? Fluorescent lights are energy-saving and all but if you want to replace them with something better, we recommend you to go for the LED recessed lights. Often known as CAN lights, these are energy efficient and also highly durable.
Let us get back to the removal once again. When you are done with the electricity, you have to go ahead and take off the light fixture. As the power is turned off, you do not need to worry about any unwanted accidents. Here, you have to hold the fluorescent light and remove it.
In this case, the disposal of the bulb is something you should care about when you plan to remove it. These can get recycled, keep this in mind. Once you have taken off the bulb, you have to go through the light fixture. For this, you will need a screwdriver. With the screwdriver, loosen the light fixture first. And then, you can easily take it off from that position.
The lights usually have two different screws on both sides of the electrical connections. However, there are differences regarding the screws too. Check for the screws properly and then start removing them. Take off all the screws and you are done with this step.
Step 3: Covering the Wires
Once you have worked with the screws, you have to check for the light’s box now. The electrical wires are usually covered. If you keep your electric wires open, children and even adults can touch them and cause damage to themselves and your property. So, it is always highly recommended that you cover up the electric wires for your safety.
Go through the wires and make sure that they are covered with wire nuts. If you need to replace the fluorescent light fixture, you can do it after you are done with this step! In some cases, the light usually hangs directly to the ceiling. In that case, go for an electric box so that you can keep it safe and secured. The ideal electrical box is vital here.
The electrical boxes include mounts along with swing clamps. These will help you add the ceiling from the lower position. If you have a pre-installed electrical box, you do not need to go through this step.
Step 4: Working with the Wall
Check the electrical box. You might find a template there. With that, all you need to do is punch some holes! Go for some holes in the ceiling. Use an awl for this method. Now, it is time for you to cut the drywall. For this, you need a sheetrock saw. With it cut out the drywall.
However, make sure that you are very careful while you are cutting the drywall. Also, ensure that you have worn all the safety gear that you need to keep you safe. Once you have cut the drywall, you have to get the electrical box inside the area.
Certify that the cut area is just perfect for the electrical box. Place the electrical box in its right position inside the hole of the ceiling. Move it and make sure that it fits properly. In this way, you can install the electrical box without any complications.
Step 5: Fix the Wall
Once you are done installing the electrical box, you have to go check the wall. Yes, you have created a mess already! Now, it is time to fix it! You have to repair the holes that you have made for installing the box. As you have cut the drywall, you need to repair it.
The best part is the drywall repair patches are available in the market. All you need is to get the repair patches and start working with the holes. Buy the patches according to the number of holes you have made on the wall. Now, cover the holes with the patches, and you are done with these!
So, now that you know how to remove fluorescent light fixtures, installing the new fluorescent light fixtures is easy! Get your hands on them and you can add them easily!
Note: Wear all the necessary safety gears for eyes, hands, and face beforehand. For any electrical work, never forget the safety accessories. And if you still think the method is tough for you, leave it to the hands of an electrician. Better to be safe than sorry!
Wrap Up
So, you see, the process of removing the fluorescent light fixture is not tough at all! All you need is a bit of patience and your equipment ready! Get the gears ready and start working! You do not need an expert for the job anymore! Now, you are a pro yourself! Also, don’t forget to check out our blog. We blog about home improvement so that you can live better and feel better!
I’m James. The author of Electricalaffairs.com. It’s been my passion to deal with power tools and gears. This website is mainly to talk about electrical wirings, lighting, various power source tools and accessories. I want to explore tackles and help people to grow their basic knowledge about electrical things. I would also like to help people to pick the right power tool for their daily needs.