 Ceiling lights and fans are a compulsory part of households today. Often times people decide to move onto a new ceiling fan and light attached fixture to save their daily power usage. That electricity bill by the end of month can be easily reduced without any significant sacrifice of comfort.
Now to preserve energy, again you don’t want light and fan to work at the same time. Because clearly, you won’t be needing both at times. So, to make that problem go away, how about wiring the fan and light separately. Yes, it’s possible to do so when you are dealing with the installation. Let’s find out today how to wire ceiling fan and light separately.
How to Wire Ceiling Fan and Light Separately.
Before we jump into the actual process, here’s something interesting. This wiring can be done in two ways. You can install the ceiling fan and light wired to two separate switches. Or you can wire one to a pull chain and other to a switch. We’ll be talking about the first method since It’s more prevalent for usage. It’s going to take you barely a few hours for this.
Determine the Right Spot for Hanging.
Selecting the right installation site will pay you off with better performance and efficiency. Not to forget a suitable location will also have a good reason to maintain safety. There are a few things you should consider for determining the ideal installation spot.
First of all, it should be hung at least 8-9 feet above the ground since that’s when a fan can offer best airflow. The blades of ceiling fan need to be at least 7 feet above ground. The blade clearance might be in trouble if you choose to install fan in a high or sloped ceiling. In that case, use a longer down rod.
Also, the blades of fans need to be at least 8-10 inches below your ceiling. The distance between wall, cabinet, door, and posts from blade of fan should be at least 18 inches. You should never choose a location in the ceiling that has cracked or damaged surfaces or surroundings.
Turn the Power Off.
Before going with any wiring steps at all, it’s important to turn power off at the breaker. You should be able to find it in your home’s electrical panel. Simply flip the breaker associated with circuit of ceiling fan. The breaker switches will have a label most probably. However, you still want to use a non-contact voltage tester for ensuring the power is actually disconnected. Sometimes there could be a chance of mislabeling with breakers. The fan’s electrical box has a black wire where you need to apply voltage tester to check.
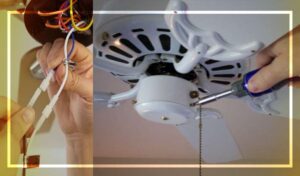
Recognizing the Wires.
The wires that stay within ceiling fan are quite simple. But when you want to work with them to connect the right way, it’s important to know what each one is. And that’s why you should read out the instructions very well. In most cases, the black wire corresponds to power supply for fans. While there are blue wires for light. There are also neutral white and ground green wires.
Apart from the wires of fan, you also need to familiarize yourself with ceiling box’s wires. There should be one each black and white wire. A copper ground wire should also be there. In the fan, black wire plays as hot and white one is for neutral.
Usually, things are not very different in any case variation. But if you want to have independent switches for light and fan, there can be some slight differences to mind. For such a double switching setup, an extra red wire should be also included in the ceiling box.
Wiring Part.
The wiring for separate two switches may look very complicated. But it’s not that difficult to understand once you get a hang of it. The basic concept of this whole thing is that both switches will be fed through power supply line.
After that, each of the switches will be feeding either light or fan kit. After that point, you will work on twisting the ground and neutral wires together. In case of lines that are going towards and from switches, we need to assume 12/2 with the ground. And that’s why you need to be very sure about labeling those as hot wires. Simply wrap around the white ends using some black electrical tape to do so.
It is true that code makes certain conditions. And so, you should bear in mind that are generally various routes for making the wiring connection. In this case, you’ll be using the regular 12/2 wire. But if you chose to go for a 12/3 wire then the whole process will become a bit less effort demanding.
Basically, you need to use both single hot or black wires for powering both switches. It’s possible by simply using longer length wires for jumping to both switches. Here jumping means holding the wire’s tiny area and striping insulation from it. So that you can easily loop it around the hot terminal.
Simply loop the exposed wire side around first switch’s hot terminal carefully. After that, by stripping the end you need to connect with second switch too. The red and white wires will be hot returns. These are the ones you have black tapes on both sides for identifying as hot wires.
Jumping the ground wire is also possible. If you go for this way, then there is no need to use wire nuts and the whole wiring process becomes less complicated. It also provides better space inside the box.
Test If Everything is Working Right.
As soon as you are done with making connections, turn the power back on. Now test if the fan and light are working right. If the fan or light does not work, you need to check wires again to ensure they are making good contact.
Keep in Mind:
Your ceiling fan must come with some wire nuts. In case they are depriving of metal inner winding and seems quite undersized, then you should not use those. Simply grab a pack from your local store.
After making connections, you can make it extra safe by taping the wire nuts. This will add an extra layer of protection to avoid unwinding.
The installation site should never have any obstacles for you while working. Make sure there are no children around and it’s not noisy to lose focus.
When getting an outlet box, go for the UL-listed ones.
All the electrical connections complied must be under regulation of local ordinances or codes.
Never skip reading the provided manual. It might come with specifically mentioned caution, safety, and warnings that you need to be aware of before manipulating with the wires at all.
Wrap Up
And that’s all for this guide on how to wire ceiling fan and light separately to two different switches. Once you get done with it, things should be running smoothly. No matter what room you are trying to install the ceiling fan in, it’s definitely going to be a great addition that brings comfort.
And trying such simple installation projects by yourself is a wonderful way to skip those unnecessary spending on hiring an electrician. Also, it’s not hard if you get to understand the whole process well. So, give it a try and maybe you’ll pass to become a capable handyman.
I’m James. The author of Electricalaffairs.com. It’s been my passion to deal with power tools and gears. This website is mainly to talk about electrical wirings, lighting, various power source tools and accessories. I want to explore tackles and help people to grow their basic knowledge about electrical things. I would also like to help people to pick the right power tool for their daily needs.