 The most awful sight in my bathroom is when during winter, windows get fogged up. Showering with hot water makes me feel relaxed but only until I notice the mirror has also been steamed.
The stale odor is a big no as well. And the primary reason for dealing with these issues was because I didn’t care about installing a proper ventilating fan in my bathroom.
A good vent can also erase troubles such as moisture build-up, mold growth and mildew issues. So, if you already don’t have one, get these.
Let’s talk about how to install a bathroom fan roof vent.
How to Install a Bathroom Fan Roof Vent in 3 Steps.
Not having proper ventilation means owning a fireplace without a chimney. It’s risky and not appropriate. So, take your time to properly to select a roof vent and then follow the instructions to get it installed at your bathroom easily.
General Idea on Exhaust Route Determination
It’s compulsory to have the exhaust fan vent outside. If attic wise access isn’t available you need to think about sidewall. Learning the right way on how to install a bathroom vent through a wall will be necessary then. Most likely, the process is complicating so it’s better to contact professionals here.
Now with the right access to attic, using a fan vent on a gable wall or roof is just the right thing to do. Don’t let the exhaust happen into the open attic, however. This will invite moisture build-up on the roof’s underside.
Also, if you have bathroom exhaust fans with light then there should be an additional or double switch. So, you can easily turn it on or off. In other cases, you need to set up new wiring for operating a double switch.
Tools & Materials Required.
- Pry bar
- Corded Drill
- Caulk Gun
- Hammer
- Jigsaw
- Roofing Nails
- Duct with insulation (strong or flexible of 4-inch)
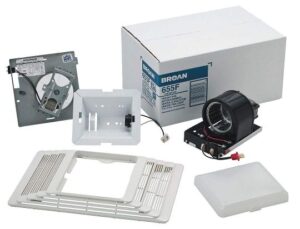
- Exhaust vent for roof mounting.
- Asphalt Roof Cement.
1. Through a Roof Hood Venting Exhaust Fans
 Smooth and tough ducts with taped joints screwed nicely through special vent hood. And you have your finest exhaust fan venting system. However, in attic crawl areas, this becomes quite not possible. To get rid of any condensation problem, there’s a need to insulate duct.
In most home centers, you will discover that the 4-inch duct is wrapped already in insulation. So, your temptation to vent exhaust fan through the attic or existing roof vent might not be a right thing to follow.
The partial block will happen with roof vent through piping. This is enough to reduce the cool airflow through attic. Also, during cold winter days, the warm and moist air will be blowing onto cold surfaces. This is usually the roof plywood and vent.
And as a result, there will be water condensing. This will cause dripping into the insulation, sometimes even in your house. With a bathroom fan rood vent that comes with internal damper, you can enjoy moist air sent outdoor with the fan opening and keeping cold air outside.
2. Vent Hood Installation on Roof.
You need to decide on the desired location where you will vent. Now start drilling a hole in that location on the attic. This hole should go through the roof to desired vent location. It should be close to the location of fan.
You should be able to find the hole easily. So, you can simply leave this sticking outside to catch their sight easily.
Now it’s time to make a 4-inch round hole. Use a reciprocating saw or jigsaw from the roof to make that hole.
Focus on the protruding part of vent. You need to measure a square that is a bit larger than this part. Use a hook blade fitted in a utility knife. You need to get rid of all asphalt shingles with this. You should use gradual force to pry up the shingles around this hole. So that there’s enough room, for vent to slide below the first course.
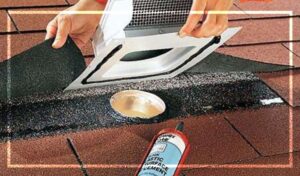
3. Putting Roof Cement.
On the bottom of the vent, you need to spread some asphalt roof cement next. The top half of vent flange needs to be covered. Simply slide the vent under shingles to do so.
On the top of shingle, flange’s lower half should be placed. Use some good roofing nails to attach the lower corners and also tar heads.
Conclusion
That was a simple procedure on how to install a bathroom fan roof vent. There are many other ways to do so but this should be enough for beginners or never-did-it-before buddies. Hopefully, the ideas and instruction will be helpful to fit this great thing into your space. Make sure you follow the right guidelines to get a nice after result. Good Luck with That!
I’m James. The author of Electricalaffairs.com. It’s been my passion to deal with power tools and gears. This website is mainly to talk about electrical wirings, lighting, various power source tools and accessories. I want to explore tackles and help people to grow their basic knowledge about electrical things. I would also like to help people to pick the right power tool for their daily needs.