 Forcing those unwanted bathrooms air out of your building is what basically the exhaust fan does. It’s a very rudimentary tool for a bathroom space that suffers from moisture damage and molds. Those who are an owner of the single-story home needs to follow different installation than more-than-one-story-homes.
In most cases, the common scenario is duct routing through attic and connecting roof jacks. However, one can also try wall mounting that is way better for first-floor exhaust fan installation.
Today we’ll focus on how to install a bathroom exhaust fan on first floor using wall mounting method.
How to Install a Bathroom Exhaust Fan on First Floor Through the Wall.
The process of using a bathroom exhaust fan on first floor may seem a bit troubling to some people. However, with the right bathroom exhaust fan, it’s not a pain like you may believe. Let’s break down the process to assure you about that.
Understanding the Difference with Installing on First Floor.
For a house that can’t have access to the attic, it’s probably not going to work if you use ceiling mounted exhaust fan. In these cases, it needs some extra steps to help the route travel all way to attic. And that’s what the scenario looks like with a multiple-story house’s first-floor bathroom.
One common solution here is using the wall-mounted fans. These are super simple to mount on an external wall and work best when there’s no practical way to vent through roof.
 Materials You Need:
- A wall exhaust fan
- Cardboard
- Voltage tester
- Eye protection goggles
- Gloves
- Drill
- Screwdriver
- Ice pick
- Marker
- Handsaw
Turning the Electricity Off
Working with electrical parts means you need to disconnect any electricity supply connection. During the process, you don’t want to accidentally shock yourself. So, your first task is to find the breaker box inside your bathroom. Simply turn it off and double-check for confirmation.
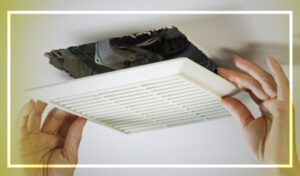
Tracing the Fan in Place to Cut a Hole.
Now it’s right time to wear those goggles and gloves because you’ll be dealing with the actual installation procedures. Make sure the bathroom floor is completely dry so that you don’t accidentally slip fall over it. Also, spilled water can cause a shock later.
Determine a spot on the wall where you will basically place exhaust fan. It’ll be better if you decide to place fan opposite the door. This way the tool would be able to expel stagnant air efficiency. And also, the force becomes more powerful. You can also place the fan on another wall that is opposite to a big window.
You need to carry the fan housing and place it over that spot. Use inner portion and mark down edges over the wall using a pencil or marker.
Now the tracing you just made will have four corners where you’ll drill holes through. Start by placing the saw on one hole. Now continue to cut and you want to travel from one hole to another. This way you can handle cutting an entire section of the interior wall.
Make sure to be well aware of where wires and pipes in the wall are located. So that accidentally you don’t cut through those elements and cause trouble.
Creating a Template to Locate Screw Placement
Now you will basically allow the similar process mentioned in earlier step. This is to create a template for the exterior wall over a cardboard piece. You should line carboard against casting of the actual exhaust fan. Get the drill and make some holes again. These holes will help in placing and fixing exhaust fan onto the wall.
You need to put fan over the opening next. Now, simply markdown that location where screws are going to get placed on exhaust fan’s housing. You can use an ice pick here to make things easier. The mark left needs to be prominent enough. So, make sure the ice picks are reaching external wall well. Otherwise, fan would fail to align against the wall in a proper way.
Attaching Exhaust Fan to Wall
The spots where those screws of exhaust fan are available, you need to drill holes there. You need to use a quality screwdriver to securely attach those screws and make the fan tightly attached to wall. Now use voltage tester and check on the exhaust fan’s black wire. Simply insert it onto the tester and see whether electricity is actually turned off.
Making Electricity Connection for The Fan
So now you are absolutely sure the electricity is completely turned off. So, you are safe to go for the next setup which is creating an electrical bond between your bathroom’s exhaust fan and main electricity connection of your home.
You need to use the wire from the exhaust fan to run it through wall. Make sure the wire is reaching for breaker comfortably. Now it’s time to match the colors of those wires. Matching colors will connect together, remember that, and attach them safely.
Once connection is made firmly with the help of a screwdriver, you just need to turn on power supply. If the installation is done correctly, fan should work well. And now you have a well-ventilated bathroom space.
Conclusion
Looks like we are almost by the end of today’s discussion on how to install a bathroom exhaust fan on first floor. I hope the entire thought behind such installation is clear to you.
Installing a bathroom exhaust floor could be easier to some while daunting to others. It isn’t really a hotchpotch honestly. But depending on your home’s design and layout, things may be a bit complicating.
If you are still not sure about how to place the exhaust fan onto your first floor’s bathroom, contact a professional. Usually, they can look into your individual problem and suggest accordingly. That way you are absolute about how things would go in your case.
Leaving on That Note!
I’m James. The author of Electricalaffairs.com. It’s been my passion to deal with power tools and gears. This website is mainly to talk about electrical wirings, lighting, various power source tools and accessories. I want to explore tackles and help people to grow their basic knowledge about electrical things. I would also like to help people to pick the right power tool for their daily needs.